I can only imagine that for the professional smiths, you have little choice but to press on and complete any projects you start, and do so in a timely manner. That’s (fortunately / unfortunately?) not the case for the hobbyists amongst us.
I can only speak for myself, but I assume others find themselves in a similar situation. I have a long laundry list of projects that I want to make ‘at some point’. I’m forever saving photos of things I want to try making, and have friends, family, etc. constantly asking me to make things for them. On occasion I’ll start a project and it gets set-aside before I’m finished. Perhaps it was something too ambitious for my current skill level, perhaps its more time consuming than I anticipated. Sometimes I’m just too tired to work at the anvil for too long after a full day working at another job, or (being in a residential area) I have to be considerate of how late I can keep making smoke and noise before upsetting the neighbours.
Whatever the reason, some projects get abandoned. If this happens to you as well, I’m going to urge you to revisit some of those projects on occasion. This is the story of one such project…
A couple of years ago, when I was a student at the Willowbank School of Restoration Arts, Lloyd Johnston (who teaches the short introductory blacksmithing course there) was kind enough to give me a little bit of wrought iron to try working with. I tucked that bit of bar away in my toolbox, intending to save it for a special project.
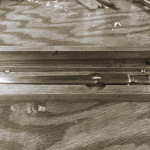
In the early stages -just roughly forged to shape
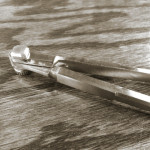
Fast forward a few months, and I was doing a demonstration at Willowbank’s open house. Someone asked me the differences between steel and wrought iron, so I pulled that bar out and decided to give it a go. I had no real project in mind, but squared up a length of the bar, and drew it out to a long taper. Ah ha! I’d always wanted to make a set of dividers – this would be perfect. So I cut off a length, and did the same for the other half. And that’s the point at which I ‘hit the wall’ (energy, time and skill wise). I had no idea what to do as the next step. So back in the toolbox those two pointed bits of wrought iron went. And there they stayed, for the next two years.
Between then and now, life happened. I had to leave school and go back to work. Smithing was put on the back burner, as I lacked time to do much. But one cannot escape the smithing bug.
A couple of months ago, I reopened my garage and sparked up the forge. As I was going through my tools, I found that wrought iron and thought to myself “I should really get those dividers finished”. I came back in the house, looked up some examples, printed some photos and ordered myself a copy of Peter Ross’ instructional video.
It was at this time that I also realized that my former Willowbank classmates were quickly coming up on their graduation. I was out for dinner with a couple of them and they were discussing getting a thank-you gift for our carpentry instructor, to give to him at graduation. Well, that was all the motivation I needed. Instructional video or no video, I had to get these done in time for graduation. Three evenings later I had a completed set of dividers.
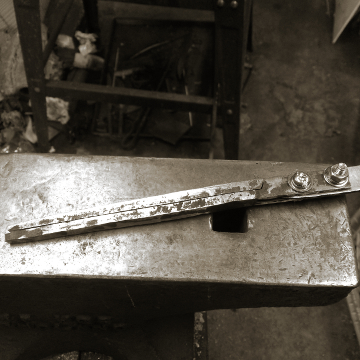
They’re not perfect, but I’m quite pleased with them. I ended up splitting the top of one piece to make the two-leaf side of the hinge. It was only afterwards that I saw the Peter Ross video, and learned that he forge welds his. I may try that on the next one.

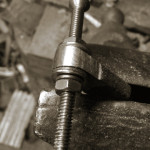
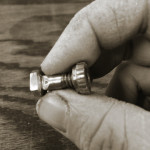
After discussing the dividers with several people, I decided not to rivet them but rather to make a stove/carriage bolt with a knurled nut to allow the end user to easily adjust the tension. I’m not sure it was worth the extra effort and will likely rivet the next pair, but it was a valuable experience. I don’t have a lathe so those parts were forged to rough shape, then finished with files. A lot of filing. I now understand the old whitesmiths adage that an extra 10 minutes at the anvil can save an hour at the bench. Each and every part (except for a spring washer) is made by hand, from the wrought iron.
 The most difficult and time consuming part was that decision to go with a nut & bolt vs a rivet. Filing one of the holes in the two-leaf half of the hinge from its drilled round hole into a square (without damaging the drilled hole on the opposing leaf) was quite the daunting task. Perhaps there is an easy way of doing that. If there is, I’d love for one of you to share it.
My first attempt at making the knurled nut was also way off. It was far too large in scale, and so it took quite a bit of extra work to get it smaller in diameter, and half its original thickness. Again, all with files.
There really isn’t much more to tell about the project itself. What I really wanted to talk about in this article, is the idea of revisiting those half-done projects some of us have sitting on the shelf. I have found that the act of finishing these off, has given me a real boost in energy and motivation. It’s rekindled that spark in me, to get back out to the shop (tired from work or not). Now to start tackling some of those other projects on the to-do list.

This post was also published in the Spring 2015 issue of the Ontario Artist Blacksmith’s Association newsletter ‘The Iron Trillium’
You must be logged in to post a comment.