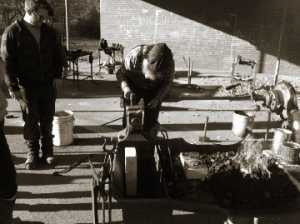
Posts Tagged ‘blacksmithing’

Lloyd & Co.

Thursday, March 27th, 2014

Lloyd Johnston was back at Willowbank this week, teaching the new group of first years.  Seemed a good reason to venture out to Queenston for a visit.

tf-img-202

I think the school is slowly but surely figuring out the logistics of blacksmithing with a group this size (the new forge studio, when complete, will obviously go a long way to addressing this).  At one point they had seven forges going this session.  I believe they gave up on one of the small forges after a time – but were managing well with six.

It’s always fun to see who Lloyd has brought with him.  Every time he’s come in the last two years, he’s brought another smith with him to assist.  And they’ve all been just great!  I’d sure like to meet more of Lloyd’s smithing friends, and hope he continues bringing new people with him when he visits.


Ahh, finally – blacksmithing!

Friday, November 9th, 2012

I think, perhaps, some of them finally understand…

tf-img-097My poor class mates, have had to hear me drone on and on about blacksmithing on too many occasions.  But only one of them had ever smacked at hot metal before, so I don’t think any of the others could appreciate my enthusiasm.  That is until yesterday and today.  We’ve just had two days of Intro to Architectural Metals and a basic blacksmithing course.

As someone with a bit of experience (not to mention having extra equipment to loan the school), I had the privilege of assisting our instructor, Lloyd Johnston, for the two day blacksmithing course.

Overall, I’m very happy.  The course was very time-constrained, and so the other students only got a taste of coal smoke – but we’ll be having more later in the year.  A number of them seem really pumped, and have asked if they can do some extra-cirricular smithing with me in the meantime.

The instructor, Lloyd, was fantastic, and I learned a lot from him in a short time span.  I hope he’ll be the one the school brings back in the spring for our next session.  Two days was far too short.

tf-img-099 tf-img-098 tf-img-096

Ghetto forge

Monday, October 1st, 2012

There is a bit of a rumour going around at school – that the long-term viability of the forge program may be in jeopardy.  The issue, is that Willowbank doesn’t have it’s own blacksmith’s shop.  Students were previously travelling to the instructor’s studio (a good few hours drive away).  This year, the size of the student body has doubled, making the logistics of that a bit more difficult.

Ideally, we would have our own shop at the school, large enough for 10 or more students at a time.  The issue with that, is the expense. To equip a large shop that would only be used a few days a year…

So one of the second year students and myself, decided we’d try to build a prototype small, inexpensive forge, that would be suitable for the light work that the students do in their introductory level courses.  Something along the lines of the ‘break drum’ forges that a lot of hobbyist smiths start with.

This design is modified from a Popular Mechanics article that I found online.  It uses a stainless steel kitchen sink, lined with clay; and off-the-shelf plumbing fixtures for the tuyere.

tf-img-108tf-img-107


It may not be pretty, but it works quite well.  We’ve got about $60 CAD in materials, and a couple of hours of work into building it.  The blower is an old hairdryer.  The stand is a cheap portable/folding work bench.  The tuyere is made from 1 1/2″ black pipe.  It’s a floor flange, two 4″ nipples, a Tee, a cap (for the ash dump) and a 12″ nipple that the hairdryer attaches to.  Inside the forge, above where the floor flange enters the sink, we used a cast-iron floor drain cover set into the clay.

We didn’t have any coal on hand, so fired it with charcoal to test it out.  Not the ideal fuel for a bottom-blast, but it got fairly hot.  The small hairdryer provided a surprising amount of airflow.

I’ve no idea if anything will come of this.  But I enjoyed building it, and we have shown (in theory at least) that we had to, we can build something that would get the job done, on a tight budget.

The Hammer & Tongs, Revisited

Wednesday, May 30th, 2012

What a weekend!

Not only did I go back to see David Robertson for his Intermediate Course, but my wife & I decided that she and the kids would come too, and make a mini-vacation out of it.  They would do day-trips while I was blacksmithing.  Four days, 1,100 kilometers of driving and a first proper family vacation later, and I am exhausted!

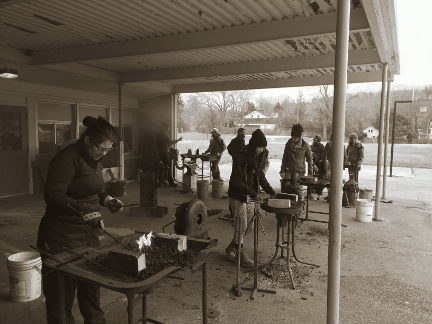
The course was everything I’d hoped it would be.  As mentioned, this one is more technique-oriented.  We did a lot of things … a fair bit of punching, slitting and drifting, made a slitting chisel, different types of joinery, and forge welding.

The first project was a bar (1/2″ square), which we drew out to a long point, punched through, and fed the tapered point back through the bar – what David called ‘threading the needle‘.   It makes for quite an interesting form, and a very comfortable handle too.  We broke off from this bar for a while to make our own slitting chisels.  New chisels in hand, we slit another section of the bar, are drifted it out to a circle on a cone mandrel.  This circle was then twisted.


We were done with this bar at this point, but at the end of the day on Sunday (when students have time for personal projects), I forged out the other end of the bar to make a fire poker for my dad (after all, Father’s Day is fast approaching).

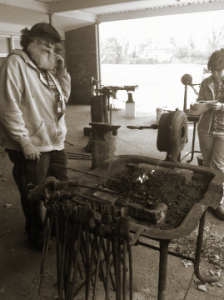
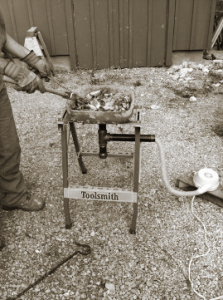
The slitting chisels are by far one of the most useful tools I’ve made so far:


It started off as a short section of steel that’s similar to S7 (from a NASCAR axel, apparently); and was drawn out under the air hammer before a bit of grinding and a light sanding.  And I’ve got to say, thank goodness for an air hammer!  That’s definitely something to put on my long-term wish list.

Slitting chisels made, we continued to put them to good use for the rest of the course – and they performed marvelously – as good as any commercially made tool that I could buy.

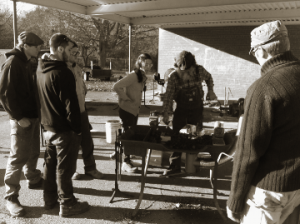
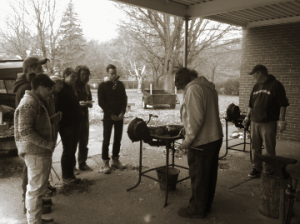
I’m still a bit tired (sleep deprived – mainly due to the toddlers), so am having difficulty remembering what projects we did in what order.  However,  in no particular order:

We made two as-near-to-identical-as-possible scrolls using a scrolling jig.  These two scrolls were later joined using hot-wrapping.  I really liked doing the hot wrapping.  I think I could happily do that all day, and will certainly find projects to do it on.  Will have to add a torch kit to my wish list too…

One of my favourite projects / techniques was the mortise & tenon joint.  I have to say, that it is this project that has taken away any apprehension I had for working with larger, thicker material.


The larger bar was slit through (which was a heck of a lot of hard work), and drifted into a square hole.  The other bar was forged to form the tenon.  After a test-fit, it was time to upset the end of the tenon.


We also did a wedged joint – which I suppose is a type of a mortise & tenon, except that the tenon is a strap that’s bent over, and held tight with a wedge (hmm, looks like I didn’t happen to take a photo yet to upload).  In any case, I like it a lot.  To me, this joint would add a fair amount of ‘wow factor’ to a completed project.

At the end of the weekend, I finally had the opportunity to successfully do a forge weld!  Now, this was very exciting to me, as I had tried on a couple of occasions on my own, with out much success.  I think the problems I’d had on my own was that:

  • I’d never seen a ‘welding heat’, and was probably a bit on the cold side coming out of the forge (having burnt a piece I let get too hot); and
  • I was working with smaller stock (1/4″ round).  Being a little apprehensive,  and the stock being small and a little on the cool side to begin with, it cooled off too quickly on the anvil before I smacked it.

However, with some instruction and guidance, I was able to do it on the course with no problems.  And I was thrilled!  I’ll definitely need some practice, but at least now know what to look for (photographs & videos suck at accurately showing colours – you really do need to see it in person) as far a a proper temperature.

My first Forge Weld!

I rounded out the weekend with a couple of personal projects: I made a spring-style hold down for my anvil; as mentioned above, I forged the other end of the one bar into a fire poker; and I started on a ‘Wizard Hook’ for my son before running out of time … but I’ll easily finish it off at home.

All in all, it was a great course, and a wonderful weekend.  I picked up some new skills, renewed my confidence, and re-charged my batteries.  The biggest lesson I took away, was to always keep learning.  If you’re getting bogged down, go do some learning with someone else.  Borrow some ideas, pick up a few tricks, or get another perspective.

I will definitely be back to see David again in the future (I like the looks of his ‘Organics’ course), and will probably look at some of the others offering courses too.  I think doing a course or two a year, with various smiths,  will be a very useful thing.  The experiences are so valuable, that the monetary cost of them is insignificant.

Re-Energized

Sunday, May 27th, 2012

I’ve recently been getting … well, frustrated isn’t the right term … let’s say “bogged down”.  That sounds about right.

I’m enjoying blacksmithing as much as ever, but my ‘to do’ list of projects seems to be getting longer and longer, and no matter how much time I spend working, I’m not making much headway.  Not only metal working projects, but all sorts of other things.

As mentioned in a previous post, I’ll be going back to school full-time in September.  In the meantime, I’m trying to set-up a new workshop, gut and completely  renovate a house, look after my two small children, and help out family members with some of their own renovations.  On the smithing side, I’ve been collecting stuff, much of which needs some TLC before I can make full use of it.  I need to make a new spring and mounting bracket for my leg vise; to find a home for my large forge, and hook the electric blower up to it, so that I can fix my broken, wobbly small forge, etc., etc.

One issue, is that I’ve been ‘hitting a wall’ so to speak, on the skills side of things.  The first (basic) hands-on course I took was fantastic.  It gave me the confidence I needed to spark up my own forge, and practice / play / learn on my own.   But I was still a bit intimidated by larger, more complex projects.  And a few of the new techniques that I tried teaching myself after doing a bit of reading, were of limited success (i.e. forge welding).

So, this weekend I found the answer to my problem … I took another hands-on course.  I’m back at The Hammer & Tongs (David Robertson’s shop) for his Intermediate Course.

David’s Intermediate level course is more technique-oriented rather than project-oriented, which is exactly what I needed right now.

I’ll write another post about the course once I’m back home and rested – but I am completely re-energized now.  I can’t wait to get back to my own shop, and jump right into tackling that to-do list.