Author Archive

Iron Work Conservation short course at Willowbank

Monday, June 4th, 2012

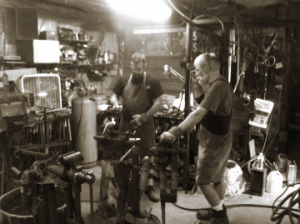
Later this week (Thursday June 7th to Saturday June 9th), the School of Restoration Arts at Willowbank, will be running a short course on the Conservation of Architectural Iron Work.  Instructors Craig Sims, Ed Bowkett and Lloyd Johnston will be covering the following (description copied from the Willowbank website):

This course is designed to acquaint anyone, whether they be architectural historians, collectors, students, curators, conservators, consultants, architects or blacksmiths, in the historic use and conservation of decorative iron in architecture.

Through class room lectures, field trips, demonstrations, discussions and hands on time with artifacts and at the forge, participants will become familiar with the vocabulary of traditional iron details and will develop the ability to ‘read’ an object to describe how it was made, to understand the metallurgical and physical properties of the materials (largely cast iron and wrought iron), and to appreciate the range of options for conservation. Subject matter will range from historic techniques, compatibility of various materials, repair options, galvanic issues, removal of corrosion products and coatings or other forms of protection.


Lloyd Johnston – Blacksmith
Lloyd’s formal education was in engineering. His self directed education and employment over the past 40 years has been in historical metal working technology and conservation. The bulk of his work has been for museums and historic sites in both the public and private sectors in Canada, the United States and Europe. Lloyd is an honourary Life Member of the Ontario Artists’ Blacksmith Association, a member of the Canadian Guild of Arms Historians, the Kentucky Rifle Association, the Council for North eastern Historical Archaeology and the Early American Industries Association.

Lloyd has taught blacksmithing and metal working at public and private Colleges and Universities over the last 25 years. Major commissions include the restoration of 12 Gothic revival gates in the Wellington St. wall on Parliament Hill, the restoration of the Hendry Gates at the Royal Botanical Gardens in Hamilton, and the reproduction of 21 patterns 1837 Brunswick rifles for Fort Wellington NHS in Prescott, Ontario.

Other interests include collecting and conserving historical weapons and stringed instruments. He lives in a fine old stone house in Beaverton Ontario with his historical collection and a Scottish ghost.


Craig Sims – Heritage Building Consultant
Craig has worked in the built heritage field for over 35 years. He has worked successfully with a broad range of clients including government agencies and community groups, but most commonly architects, engineers and contractors who require specialized knowledge. He has developed historic structures reports, historic structure condition surveys, and developed specialized conservation specifications and drawings.

Craig has worked on building types ranging from vernacular log and timber buildings on the prairies to the Parliament Buildings in Ottawa. Some projects of interest include the Rideau Street Convent Chapel in the National Gallery, the Capitol Theatre in Port Hope, Notre Dame Cathedral in Ottawa, the Colonial Building in St. John’s Newfoundland and Fort Henry in Kingston – most are National Historic Sites. He was a consultant, working with Lloyd, for the conservation of the Wellington Wall Gates and is currently involved in the conservation of the roof cresting on both the East & West Blocks on Parliament Hill. Working with Ed recently he was the consultant for the conservation of the Rolph Gates at Dundrun NHS in Hamilton.

Craig is based in Kingston, Ontario. He is a graduate of the Civil Engineering Technology-Restoration Program (1979), St. Lawrence College, and the Technical Education Program (1993), Queens University, Kingston.


Ed Bowkett – Metal Conservator
Ed Bowkett graduated from the Art Conservation Techniques Program at Sir Sandford Fleming College, Peterborough, Ont. in 1994. After being employed by The National Museum of Science and Technology, The Cumberland Museum and a private conservator, he began a private practice. During the past 18 years, Bowkett & Co. has served many institutional and private clients in the Montreal – Toronto. Ed has focused on 3 dimensional objects with a specialization in the treatment of metal artefacts, indoor and outdoor, of all sizes and has provided both treatment and consultation services to The Canadian War Museum, Canadian Conservation Institute, Public Works & Government Services Canada, Parliamentary Precinct Directorate, The Canada Science & Technology Museum, Fulford Place-Brockville, and various from St John’s, NFLD to Saskatoon, SK, and various private clients.

Ed has supervised the daily efforts of student interns on placement from Sir Sandford Fleming College; attends several institutions as a guest lecturer; and guest hosts a CBC phone in show on preservation of antiquities. Ed also continues to be an active volunteer in his community, acting as treasurer and president of the Russell Historical Society; founder and treasurer of Vintage Iron and Traditions, Eastern Ontario; and as a volunteer for The Bytown Railway Society;

This looks like an excellent course, with great instructors!  I wish I was able to attend, but if I am to go to Willowbank full-time in September, I need to save my shekels.
 

Rescued from the scrap

Sunday, June 3rd, 2012

It’s a discouraging thought for any craftsman; no matter how much care and attention you put into making something, it will likely end up in the trash at some point in the future.  I recently had the pleasure of rescuing two items from this fate … at least for now.


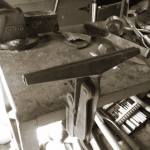
The first was an old mystery tool.  A friend of mine operates a junk removal business.  He had stopped in to see me about something, and said “Hey, I have something in the truck you may be able to make use of.  It’s some kind of a vise.“.

My friend had done a clean-out of a garage, and to the owner, this tool was just a rusty bit of metal they had no use for.  Turns out, it’s a special vise used for sharpening hand-saws.  I gave it a try, and it works wonderfully!  It needed nothing more than a light cleaning with a wire brush to get rid of the surface rust.  If I didn’t happen to see my friend that afternoon, this would have been melted down for scrap.


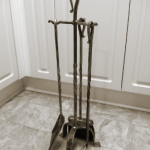
More recently, I was clearing out my (late father-in-law’s) garage, and came across a box of marked “for yard sale”.  The box had probably been sitting there at least 15 years.  It contained mostly junk, and a whole lot of mice nests, but it also had this in it.

As a student of the art of blacksmithing, I was immediately drawn to this fireplace set.  I suppose I can understand why this set was destined for the penny table at a yard sale – people tend not to have fireplace sets these days.  Those that do, often have them simply as decoration, sitting next to their gas fireplace.  This set was in rough shape when I found it … it was heavily rusted, and the stand had been painted in a thick layer of glossy black Tremclad which was flaking off.

But the more I looked at it, the more detail I noticed.  This set is old; but it is both hand made, and very well made.  After spending a good hour cleaning it up on a wire wheel, I think it’s beautiful.

This fireplace set is no masterpiece of ornamental  wrought ironwork.  It is not old enough or rare enough to be a museum piece, or to be collectible.  But someone, at some point in time, put a great deal of effort into making it.  It deserves better than to be sold off for a pittance, and eventually wind up as scrap.


I am glad to have come across both of these items, to have rescued them from the scrap heap, and to extend their life as working tools.


The Hammer & Tongs, Revisited

Wednesday, May 30th, 2012

What a weekend!

Not only did I go back to see David Robertson for his Intermediate Course, but my wife & I decided that she and the kids would come too, and make a mini-vacation out of it.  They would do day-trips while I was blacksmithing.  Four days, 1,100 kilometers of driving and a first proper family vacation later, and I am exhausted!

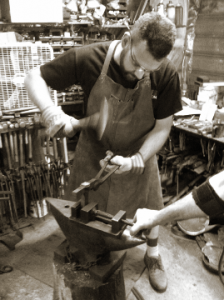
The course was everything I’d hoped it would be.  As mentioned, this one is more technique-oriented.  We did a lot of things … a fair bit of punching, slitting and drifting, made a slitting chisel, different types of joinery, and forge welding.

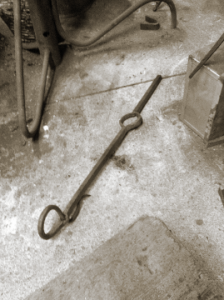
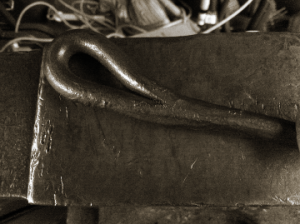
The first project was a bar (1/2″ square), which we drew out to a long point, punched through, and fed the tapered point back through the bar – what David called ‘threading the needle‘.   It makes for quite an interesting form, and a very comfortable handle too.  We broke off from this bar for a while to make our own slitting chisels.  New chisels in hand, we slit another section of the bar, are drifted it out to a circle on a cone mandrel.  This circle was then twisted.


We were done with this bar at this point, but at the end of the day on Sunday (when students have time for personal projects), I forged out the other end of the bar to make a fire poker for my dad (after all, Father’s Day is fast approaching).

The slitting chisels are by far one of the most useful tools I’ve made so far:


It started off as a short section of steel that’s similar to S7 (from a NASCAR axel, apparently); and was drawn out under the air hammer before a bit of grinding and a light sanding.  And I’ve got to say, thank goodness for an air hammer!  That’s definitely something to put on my long-term wish list.

Slitting chisels made, we continued to put them to good use for the rest of the course – and they performed marvelously – as good as any commercially made tool that I could buy.

I’m still a bit tired (sleep deprived – mainly due to the toddlers), so am having difficulty remembering what projects we did in what order.  However,  in no particular order:

We made two as-near-to-identical-as-possible scrolls using a scrolling jig.  These two scrolls were later joined using hot-wrapping.  I really liked doing the hot wrapping.  I think I could happily do that all day, and will certainly find projects to do it on.  Will have to add a torch kit to my wish list too…

One of my favourite projects / techniques was the mortise & tenon joint.  I have to say, that it is this project that has taken away any apprehension I had for working with larger, thicker material.


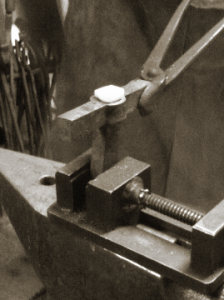
The larger bar was slit through (which was a heck of a lot of hard work), and drifted into a square hole.  The other bar was forged to form the tenon.  After a test-fit, it was time to upset the end of the tenon.


We also did a wedged joint – which I suppose is a type of a mortise & tenon, except that the tenon is a strap that’s bent over, and held tight with a wedge (hmm, looks like I didn’t happen to take a photo yet to upload).  In any case, I like it a lot.  To me, this joint would add a fair amount of ‘wow factor’ to a completed project.

At the end of the weekend, I finally had the opportunity to successfully do a forge weld!  Now, this was very exciting to me, as I had tried on a couple of occasions on my own, with out much success.  I think the problems I’d had on my own was that:

  • I’d never seen a ‘welding heat’, and was probably a bit on the cold side coming out of the forge (having burnt a piece I let get too hot); and
  • I was working with smaller stock (1/4″ round).  Being a little apprehensive,  and the stock being small and a little on the cool side to begin with, it cooled off too quickly on the anvil before I smacked it.

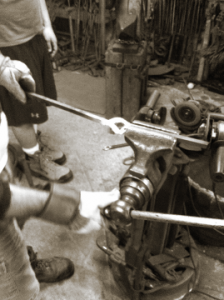
However, with some instruction and guidance, I was able to do it on the course with no problems.  And I was thrilled!  I’ll definitely need some practice, but at least now know what to look for (photographs & videos suck at accurately showing colours – you really do need to see it in person) as far a a proper temperature.

My first Forge Weld!

I rounded out the weekend with a couple of personal projects: I made a spring-style hold down for my anvil; as mentioned above, I forged the other end of the one bar into a fire poker; and I started on a ‘Wizard Hook’ for my son before running out of time … but I’ll easily finish it off at home.

All in all, it was a great course, and a wonderful weekend.  I picked up some new skills, renewed my confidence, and re-charged my batteries.  The biggest lesson I took away, was to always keep learning.  If you’re getting bogged down, go do some learning with someone else.  Borrow some ideas, pick up a few tricks, or get another perspective.

I will definitely be back to see David again in the future (I like the looks of his ‘Organics’ course), and will probably look at some of the others offering courses too.  I think doing a course or two a year, with various smiths,  will be a very useful thing.  The experiences are so valuable, that the monetary cost of them is insignificant.

Re-Energized

Sunday, May 27th, 2012

I’ve recently been getting … well, frustrated isn’t the right term … let’s say “bogged down”.  That sounds about right.

I’m enjoying blacksmithing as much as ever, but my ‘to do’ list of projects seems to be getting longer and longer, and no matter how much time I spend working, I’m not making much headway.  Not only metal working projects, but all sorts of other things.

As mentioned in a previous post, I’ll be going back to school full-time in September.  In the meantime, I’m trying to set-up a new workshop, gut and completely  renovate a house, look after my two small children, and help out family members with some of their own renovations.  On the smithing side, I’ve been collecting stuff, much of which needs some TLC before I can make full use of it.  I need to make a new spring and mounting bracket for my leg vise; to find a home for my large forge, and hook the electric blower up to it, so that I can fix my broken, wobbly small forge, etc., etc.

One issue, is that I’ve been ‘hitting a wall’ so to speak, on the skills side of things.  The first (basic) hands-on course I took was fantastic.  It gave me the confidence I needed to spark up my own forge, and practice / play / learn on my own.   But I was still a bit intimidated by larger, more complex projects.  And a few of the new techniques that I tried teaching myself after doing a bit of reading, were of limited success (i.e. forge welding).

So, this weekend I found the answer to my problem … I took another hands-on course.  I’m back at The Hammer & Tongs (David Robertson’s shop) for his Intermediate Course.

David’s Intermediate level course is more technique-oriented rather than project-oriented, which is exactly what I needed right now.

I’ll write another post about the course once I’m back home and rested – but I am completely re-energized now.  I can’t wait to get back to my own shop, and jump right into tackling that to-do list.


St. Dunstan’s Day

Saturday, May 19th, 2012

There is a great deal of mythology, folklore and every day cultural references that come from blacksmithing. ‘You have to strike while the iron is hot‘, having ‘too many irons in the fire‘, going at it ‘hammer & tongs‘, something having ‘a nice ring to it‘, etc.

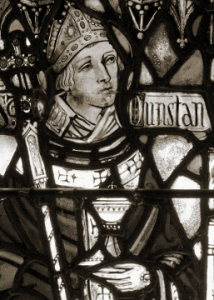
Ever wonder why a horseshoe is considered lucky? You can thank this guy: St. Dunstan – Patron Saint of Blacksmiths, Locksmiths, Goldsmiths and Silversmiths (as well as musicians and Charlottetown, P.E.I., Canada) .

Saint Dunstan

There are a number of stories associated with St. Dunstan; and as is common with mythology & folklore, not everyone agrees that these stories should be attributed to him. Some stories would appear to be older, or to have originated in other parts of the world. But they are neat stories nevertheless, so here we go…

St. Dunstan and the Devil

One story, tells of Dunstan during his time as a hermit monk at Glastonbury. While working at his forge (for he was a talented metalworker), the devil came to him, disguised as a young woman. She tried to tempt / seduce Dunstan, to lead him astray. While she was dancing around, Dunstan spotted cloven hooves under the dress, and realized the woman was the devil. Dunstan grabbed his red-hot tongs from the forge, and grabbed the devil by the nose, causing him intense pain – his screams could be heard three miles away.

St Dunstan, as the story goes,
Once pull’d the devil by the nose
With red-hot tongs, which made him roar,
That he was heard three miles or more.

Another legend, tells of how Dunstan hobbled the devil by nailing a horse shoe to him, in a manner that caused him great pain.

St. Dunstan and the Devil

Now this is where old folklore gets confusing, because there are a few different versions of it. In one version, the devil disguises himself as a weary traveler, asking to have his horse shod. In another, the devil sees how happy freshly shod horses seem – looks down at his own cloven hooves and thinks “hmm, maybe I should get some shoes too…“.

But in either case, he ends up with painful shoes on his own feet; and begs Dunstan to remove them. Dunstan agrees, but first makes the devil promise that he will never enter a place that has a horse shoe displayed.

Whatever the origins of the stories, the underlying message seems pretty clear – the devil tries to steer clear of blacksmiths (and presumably farriers)!

Today, May the 19th, is the feast day for good ol’ St. Dunstan. Now I’m not particularly religious, but it seems a good enough reason to recount these fantastic old stories, and to perhaps hang up a horse shoe in the work shop for some good luck.

Notes on the hanging of horse shoes:

Some traditions say to hang them with the heel (points) up, to keep the luck from running out. Others say to hang them with the heel down, so that the luck will flow out of them onto those who walk underneath. Some traditions say that the shoe must be used, not new; that it must be ‘found’, not purchased; and that it’s only lucky for the person who found it.

Generally, in North America, consensus is that it should be hung heel up, over or beside the door of your home. The exception to the heels-up rule, is in a blacksmith’s shop – where they should be hung heels down, so that the luck flows out onto all those who pass beneath. Because it is the smith, or farrier, who imparts the shoe with its luck (see story of St. Dunstan above), there is no fear of the luck running out.

Happy St. Dunstan’s Day!

My little apprentice

Wednesday, May 16th, 2012

Children are amazing! They soak up knowledge like a sponge – and are aware of everything that goes on around them.

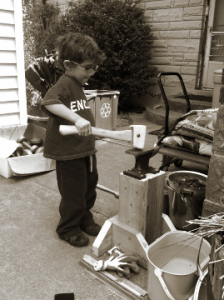
A few weeks ago, after spending an afternoon doing some yard work, we were trying to get the kids packed up and in the car. My son (currently 3 1/2 years old), absolutely refused as he was ‘too busy working’. Rather than forcing him and dealing with a cranky toddler for the rest of the day, I stood back and watched what he was doing that was so important to him…

He had an empty grass seed bag, which he was ‘pouring’ into a planter. He then took a long stick, and put it across the planter, stood back and started pumping his arm up and down in the air. At this point, I just had to ask … “What are you doing son?“. His answer: “I’m blacksmithing Daddy. This is my forge“.

The empty bag, was him pouring in some ‘charcoal’. The planter was his forge, the stick was his ‘metal’. The pumping his arm up and down, was the handle on an imaginary blower. I was in awe. My wife and I just stood and watched him for the longest time. He was a little man on a mission, and we weren’t going to interfere.

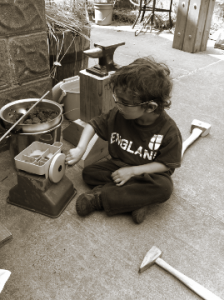
Of course, I cannot do anything other than to encourage this. And so, daddy has been busy collecting and building the things necessary to make him his own shop. It’s a work in progress, but so far, he’s loving it.

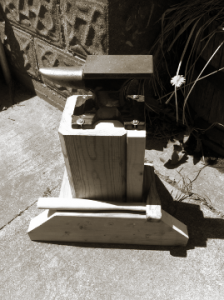
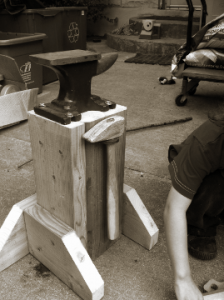
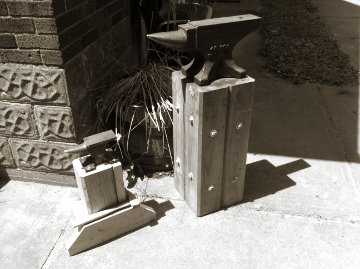
Children's Anvil

His small anvil on a scaled down stump (shown next to my 100 lb anvil for scale).

His forge is an old pot (actually a chestnut roaster), set on top of a steel pail to give it some height, filled with a few large pieces of coke. The blower, is an upside down grass seed spreader – it has a crank handle with a bit of resistance to it, and makes the right noise.

I made him his own miniature blacksmith’s cross pein hammer out of a block of hardwood for the head, and the handle from a small tack hammer (shown with my small 800g hammer for scale).


The most difficult part so far, is finding him some real safety glasses, that are child-sized. I’ve been letting him use child’s sun glasses when he’s doing his own pretend / play forging; and insist on real (adult sized) safety goggles when he is watching me work -but neither is ideal. I have ordered some which have a lot of positive reviews , the “Dyno-Mites Child Safety Glasses” manufactured by Sellstrom. I’m very anxious for them to arrive, so I can see if they’ll work out for him.

For Mother’s Day

Monday, May 14th, 2012

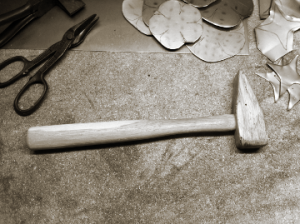
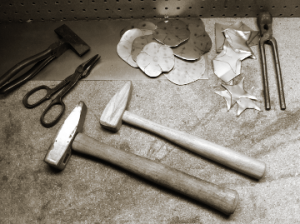
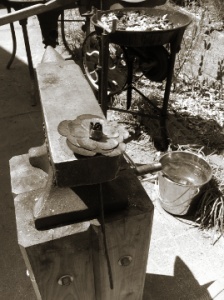
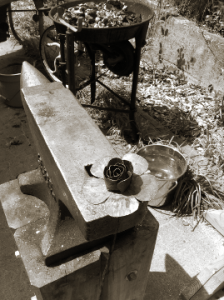
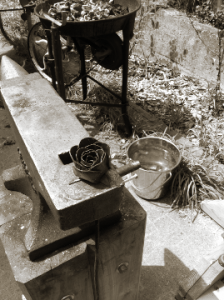
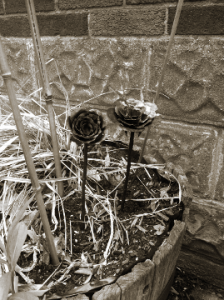
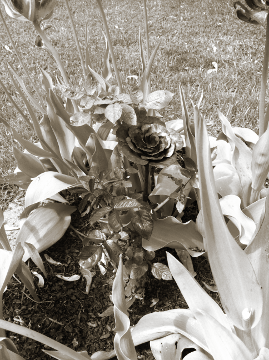
I tried my hand at working with copper for the first time, making some roses for my wife and mom for Mother’s Day.  Overall, I really enjoyed working with it.  It’s quite amazing how soft it is when annealed, and how quickly it work hardens.

I was going to try my hand at ‘flame painting’ the copper once the roses were made, but I ran out of time (my forge is set-up outdoors, and I had a few weather delays).   Nevertheless, I liked the way they looked as-is.


The stems and calyx (the pointy bit underneath the flower) are both made of mild steel, and the petals were 18 gauge sheet copper.   The copper was actually quite hard to come by – I thought for sure that Metal Supermarkets would have some, but they only had a few small pieces kicking around in their dead-stock rack.  And boy oh boy, is it expensive stuff!

For my wife - hidden in a bouquet of other roses

For my Mom - tucked into a rose plant in her garden

Forges identified?

Wednesday, May 9th, 2012

Neither of my forges has any identifying marks on them, only the blowers.  However, I happened across this scan of a page from the 1920 Sears Roebuck catalog, which I believe may identify both of my forges:

1920's Forges

The “Whirlwind” forge on the bottom left is the closest I’ve seen to my small forge.  The three legs, the bracing, the shape of the spokes on the wheel, even the location of the hood … I can’t see anything that doesn’t line up.

It’s a similar situation with my large forge, and the one pictured in the center (the “Acme combination forge and blower”).  The shape and dimensions of the forge, the shape of the firepot, the arm that the blower mounts on, etc.  It all looks identical.

Unless someone can give me a positive ID for something other than these, I’m pretty sure this is what I have.  In the unlikely event that someone happens to read this post and has other information, please don’t hesitate to post a reply.

Now, if I can only find a way to positively identify my anvil, I’ll be a very happy camper!

Burning coke

Monday, May 7th, 2012

I did some smithing over the weekend (working to a deadline, with mother’s day being just around the corner), and tried burning some of the coke. I like it. Actually, I was burning a mixture of coke and charcoal. I got the forge started on the charcoal, then threw some coke in, burning a 50/50 mixture.

I don’t think I can burn coke alone in the small forge, as I’m using a hand blower. The coke goes out very shortly after the air stops. Once I’ve got the larger forge going, and using the electric blower with it, that shouldn’t be an issue.

I’m going to have to switch to the larger forge sooner than later, as the wobble in the small forge is getting worse. Apparently one of the sockets that the legs go into was cracked when I got it, and recently had a chunk break off.

Found a new coke dealer

Wednesday, April 25th, 2012

I just bought 150 Kg of coke from a new supplier!

Okay, now that Echelon has flagged these suspicious keywords, and I have the attention of the fine folks at the CSE (howdy folks – thanks for the great work you do!); it’s not what you think. I’m talking about roasted coal, not drugs.

So far, I’ve been burning hardwood charcoal. It’s not bad. It gets nice and hot, has very little smoke, and lights quickly and easily. But you burn through a lot of it! It’s also bad for sparks. I actually have a bag of coal too, but being in an urban setting, I can’t risk offending the neighbours with the smoke.

A number of other smiths have recommended burning coke. The problem, is that it’s not easy to come by (at least not around here). OABA does a ‘group run’ to an industrial supplier a couple of times a year, but I missed the last one, and the next isn’t for a while. Besides that, I’m pretty sure most of the guys who go, buy in bulk. I don’t want to commit to buying too much until I’ve tried working with it first.

I recently found out about a gentlemen, not too far from me, who sells it by the 50 Kg bag. I just grabbed 3 bags from him so I can try it. I’m very curious how it compares to charcoal.